How to Add Subtitles to a Video (Free, 3 Ways)
Three free ways to add subtitles to any video: AI auto-generation, SRT upload, or manual editing — with a 4-step accuracy check and export tips.
A large share of short-form video gets watched with the sound off — on a commute, in a queue, next to a sleeping kid. If your video doesn't carry subtitles, those viewers scroll past whatever you spent hours making. Subtitles also make content accessible to deaf and hard-of-hearing viewers, and they give platforms machine-readable text that helps your video get found.
The good news: adding them stopped being tedious. Here are three free ways to do it, from fastest to most hands-on, plus the proofing routine that separates professional-looking captions from obvious auto-generated ones.
A quick note on words: captions transcribe the audio for viewers who can't hear it; subtitles traditionally translate or transcribe dialogue for viewers who can. Creators use the terms interchangeably, and every method below produces both.
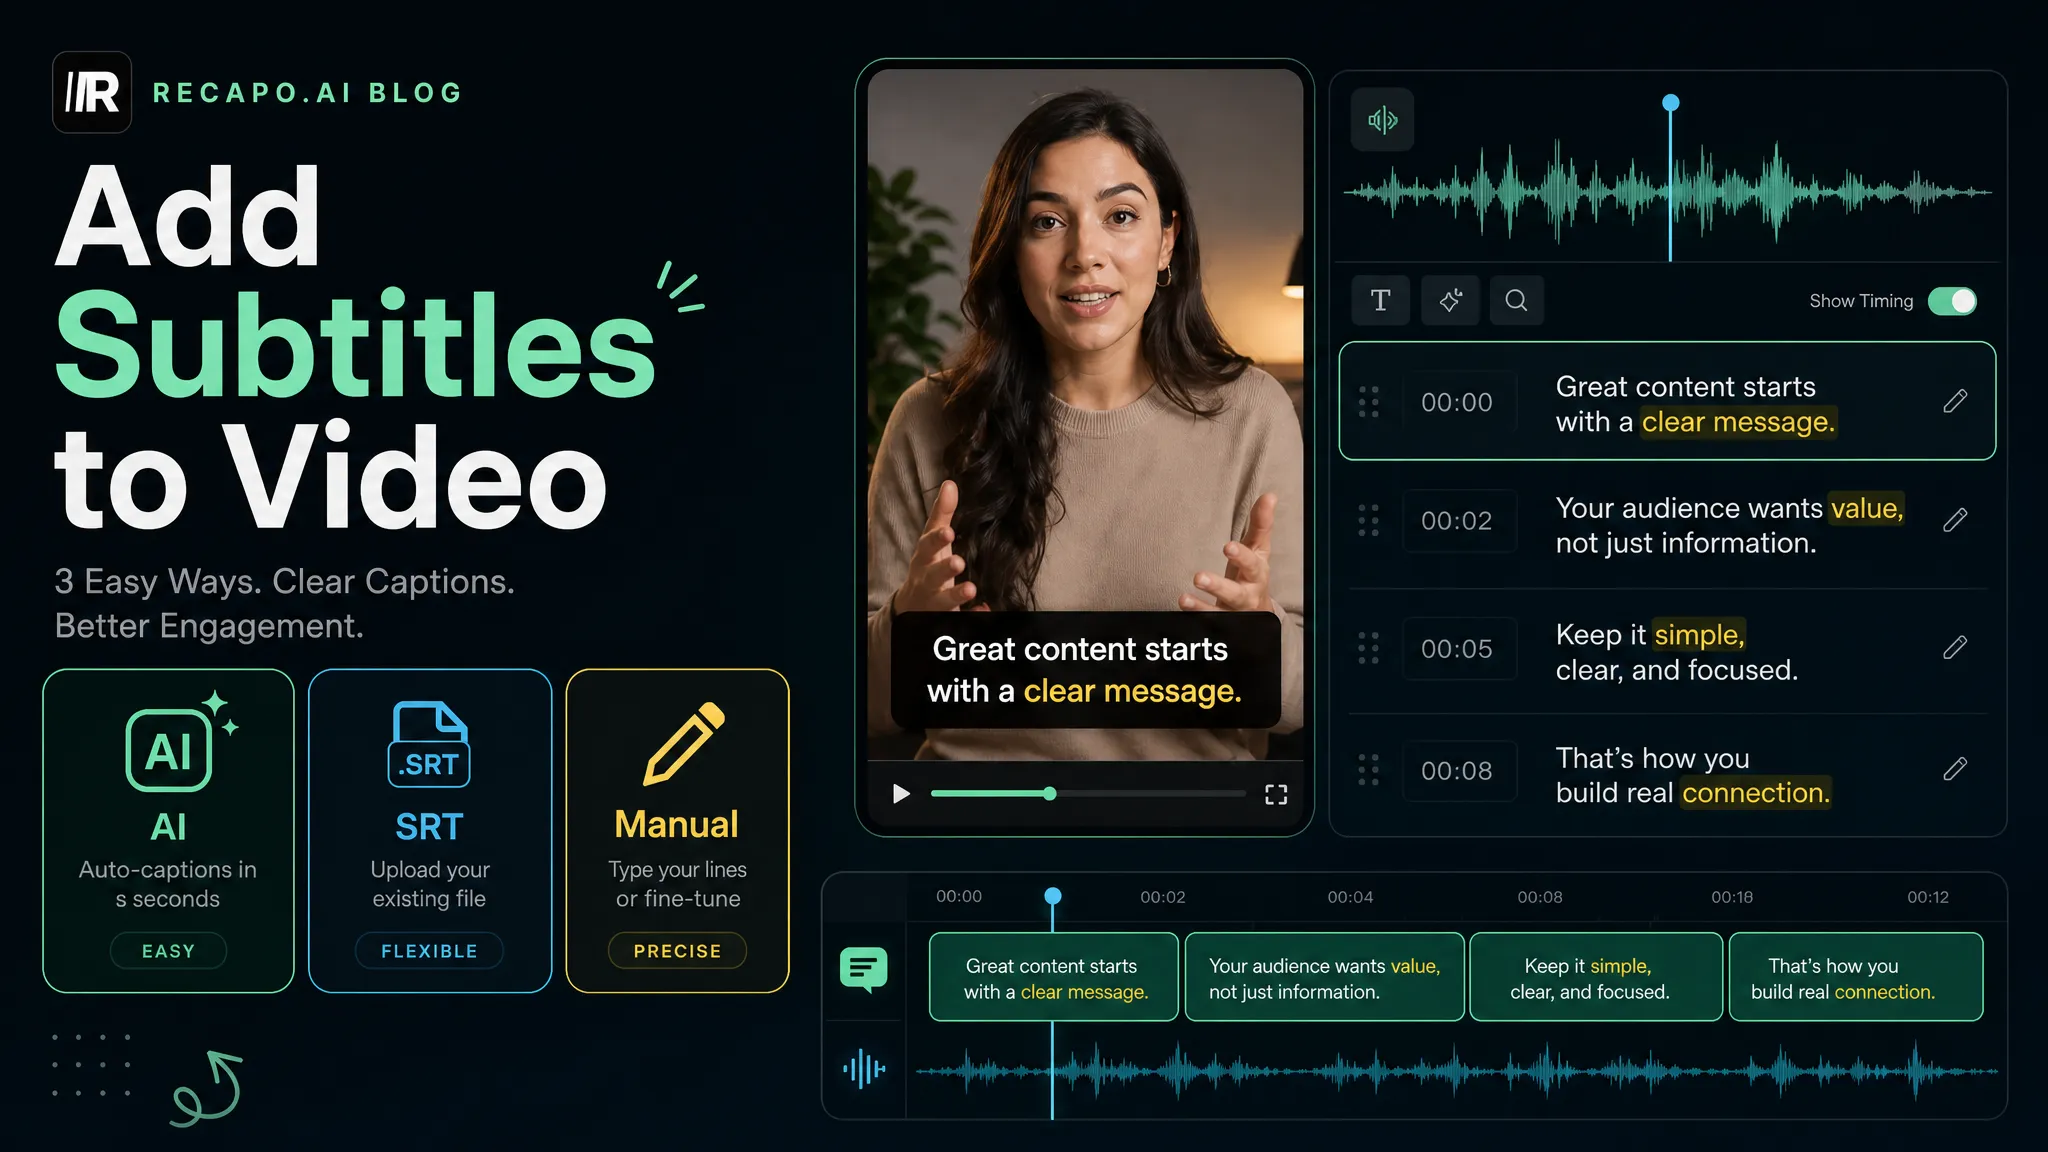
Method 1: Let AI generate them (fastest)
Best for: talking-head videos, podcasts, tutorials, vlogs — anything with reasonably clear speech.
- Upload your video to an auto subtitle generator. Common formats like MP4 and MOV work directly; if your file is exotic, convert it first.
- Pick the spoken language and let the model transcribe. A few minutes of video takes well under a minute to process.
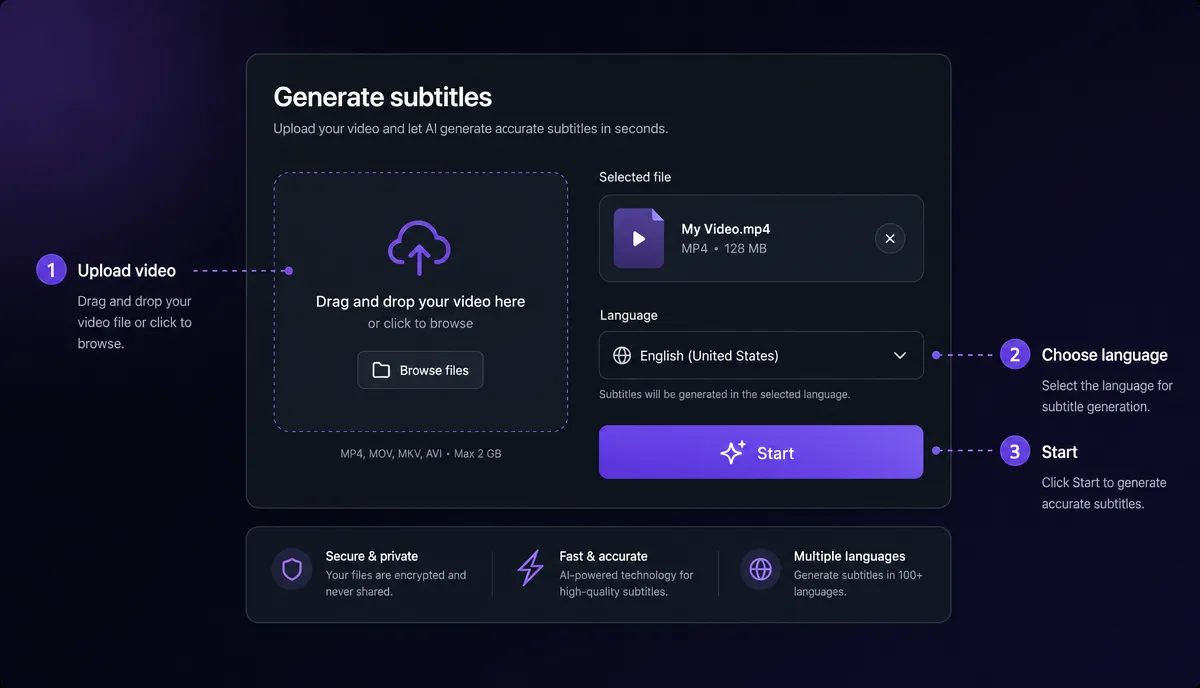
- Read the draft next to the waveform. Good tools show each caption line time-aligned against the audio so you can spot drift at a glance.
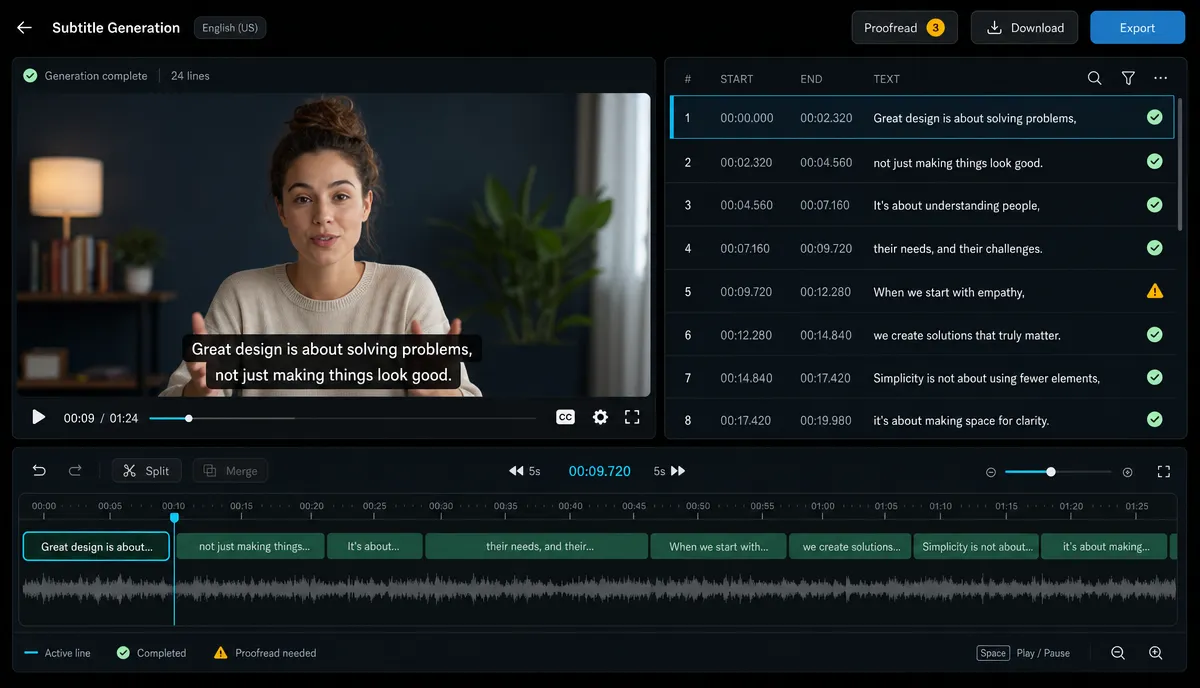
- Run the four-step check (next section). This is the pass most people skip and the reason most auto-captions look auto-generated.
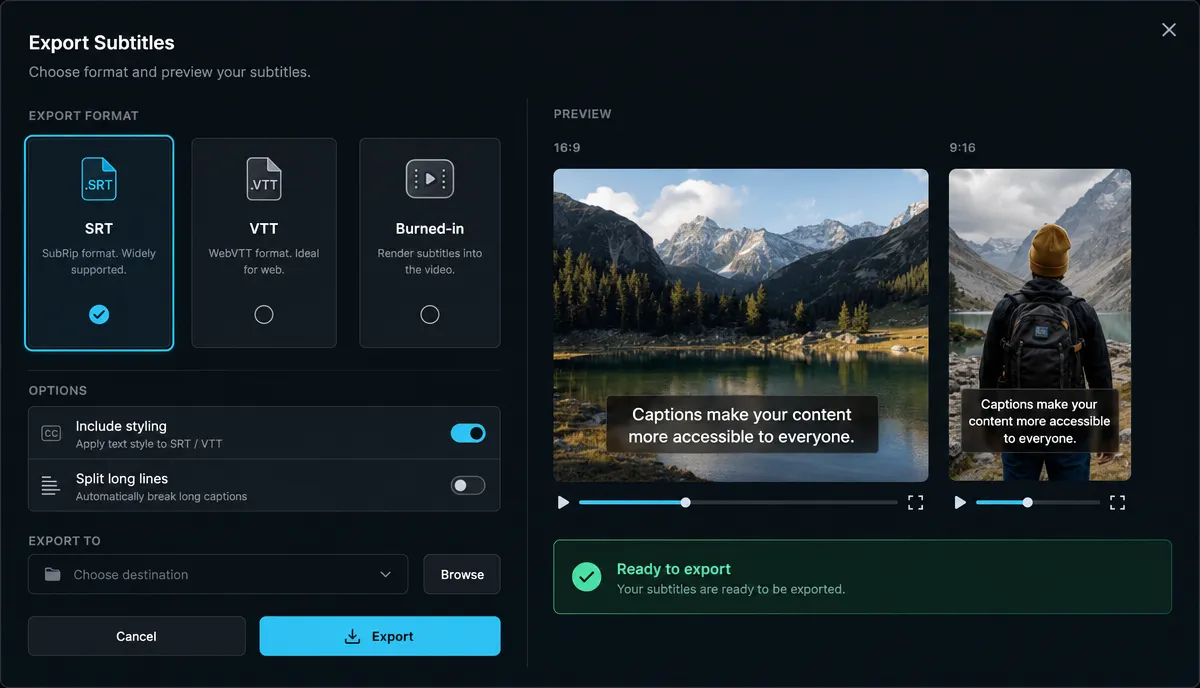
- Export — either a subtitle file (SRT/VTT) or a video with the text burned in. Which one you want depends on the platform; see the last section.
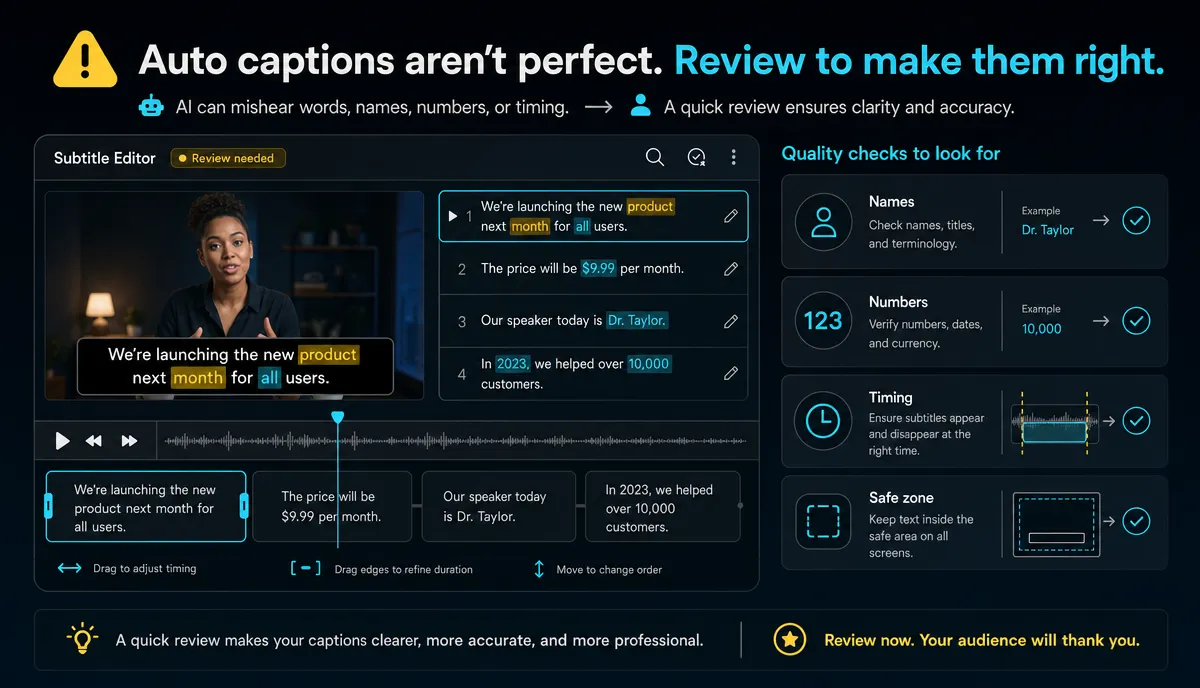
The 4-step accuracy check
Auto-transcription in 2026 is good enough that you fix words, not sentences. These four passes catch nearly everything wrong in a few minutes:
1. Names and jargon. Proper nouns, brand names, technical terms — this is where models guess. Search the transcript for every name you said and fix it once; repeated occurrences are usually consistent.
2. Numbers and punctuation. "$1,500" vs "fifteen hundred", question marks that change the meaning of a hook. Read only the lines containing digits — it's fast.
3. Timing drift. Play the first 20 seconds, the middle, and the last 20 seconds. If text appears more than a beat off from speech, nudge the offending lines rather than accepting "close enough" — viewers notice lag more than typos.
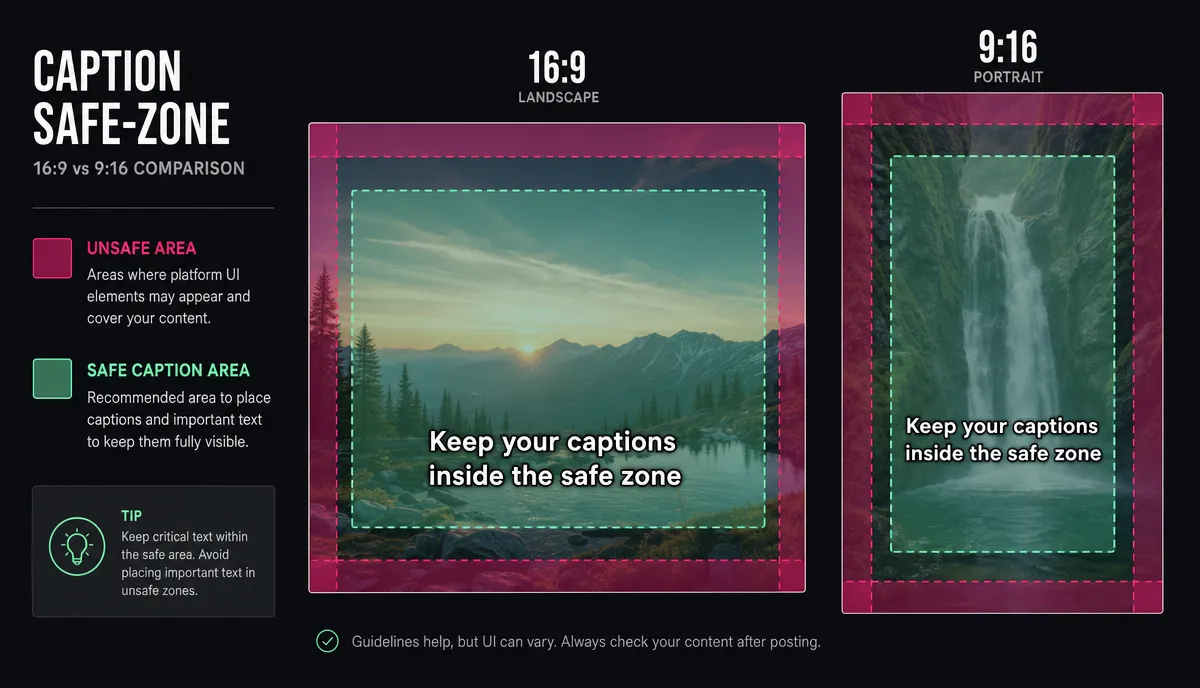
4. Safe zone. Check that captions don't collide with platform UI — TikTok's right-side buttons and bottom description, YouTube Shorts' overlay. Keep text inside the middle band of the frame.
Method 2: Upload or edit an SRT file
Best for: videos you already have transcripts for, re-publishing across platforms, or working with an editor who sends you caption files.
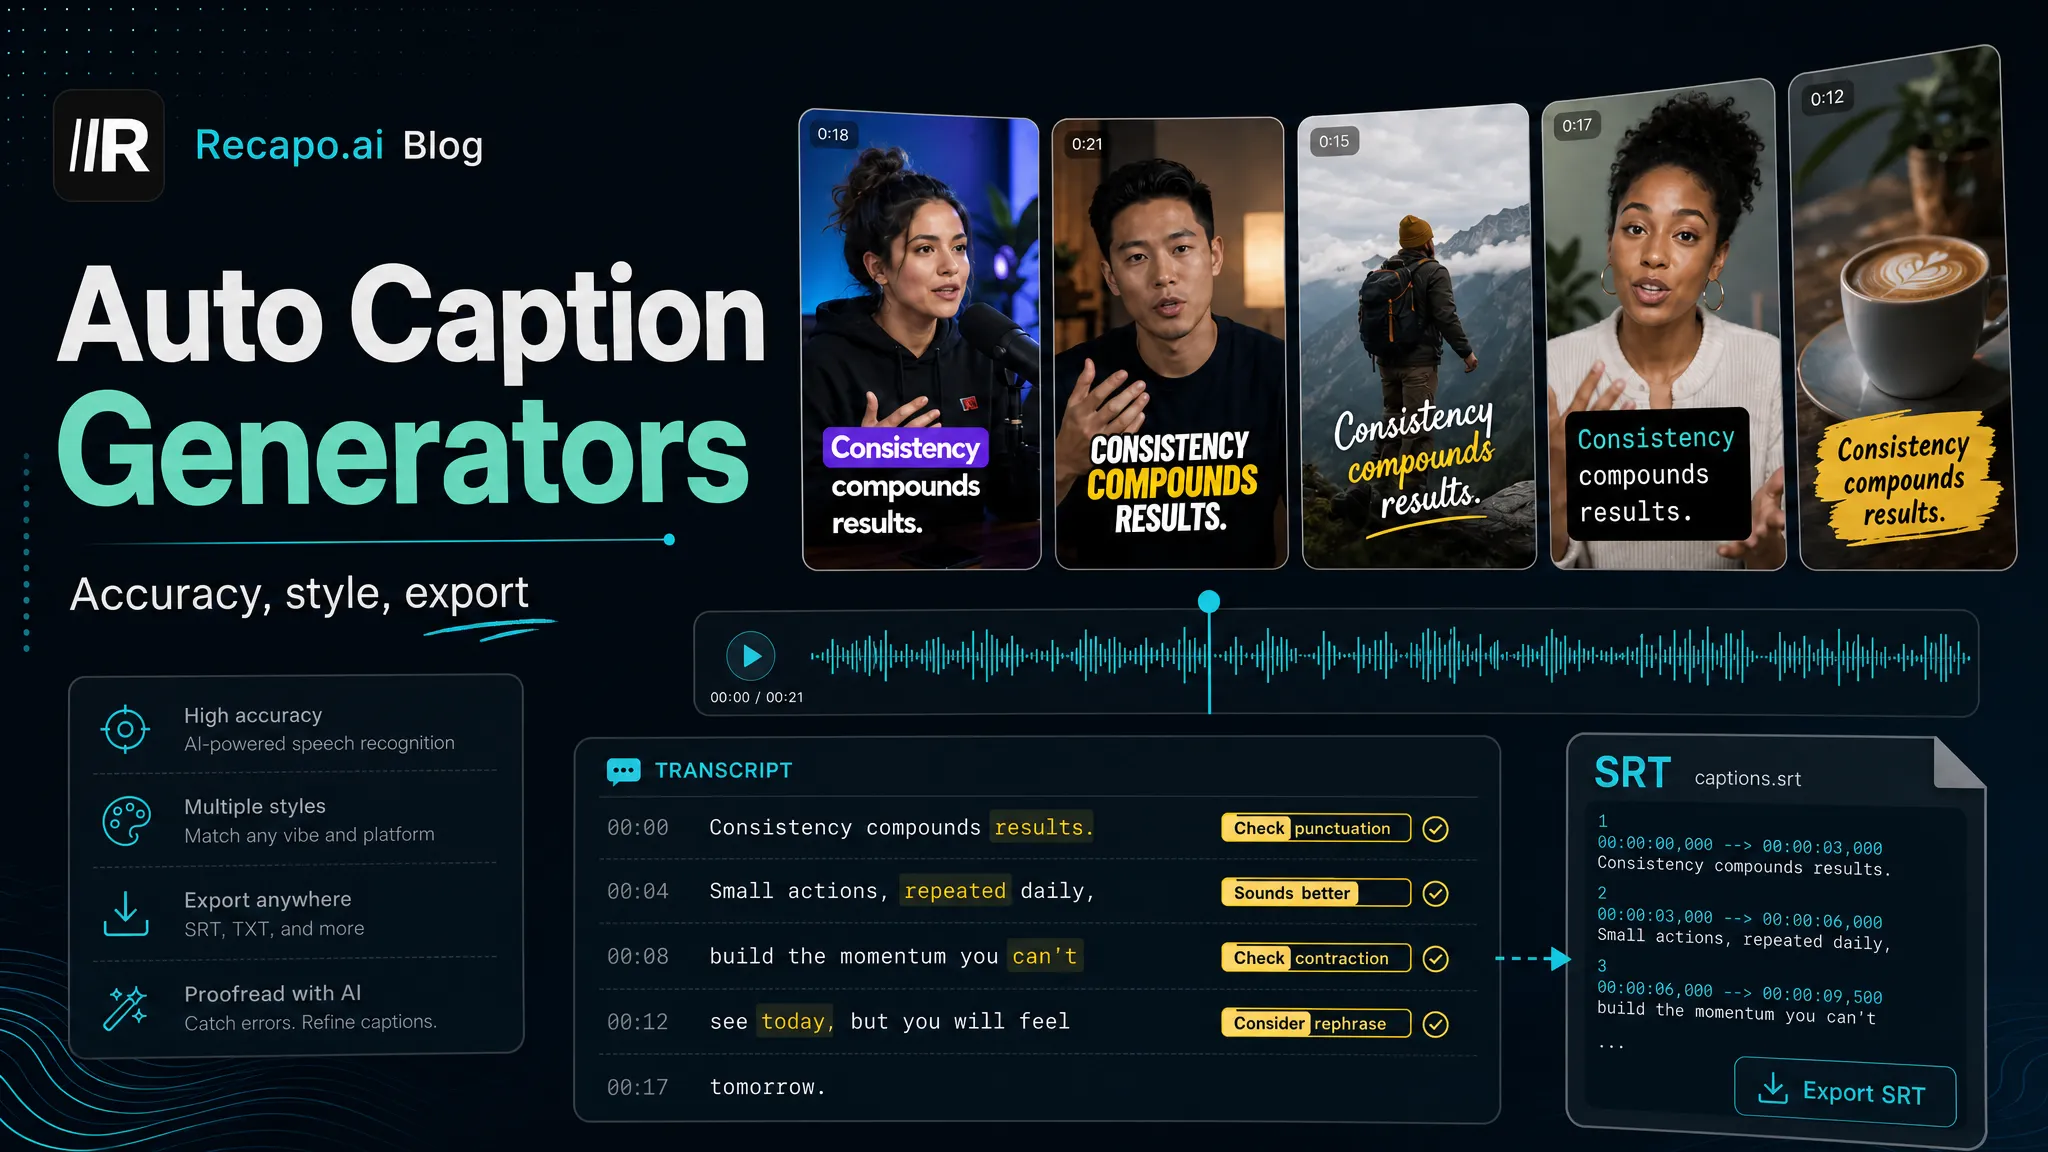
An SRT is a plain-text file of numbered lines with timestamps. If you already have one, don't regenerate anything — upload the video plus the SRT, and the text lands time-aligned. From there you can restyle it with a subtitle style editor (font, size, position, background) without touching the timings.
Two format notes worth knowing:
- SRT vs VTT: platforms mostly accept SRT; web players often want VTT. They carry the same content — convert between them rather than re-transcribing.
- Keep the SRT as your master copy. Styling and burning are one-way operations; the SRT is the version you'll translate, re-style and reuse.
Method 3: Type them manually
Best for: noisy audio, heavy crosstalk, music-dense edits, or short clips where setting up anything automated takes longer than just typing.
Manual doesn't mean primitive. Work line by line against the waveform: keep each caption to one thought, roughly 32–42 characters per line, no more than two lines on screen. Break lines at natural phrase boundaries ("...and then we left" — not "...and then we / left"). For a 30-second clip this takes five minutes and gives you total control over emphasis.
Styling that actually reads well
However the text was generated, these conventions are what make it readable on a phone held at arm's length:
- Size: bigger than feels right on your desktop preview. If you can't read it comfortably on your own phone without focusing, it's too small.
- Contrast: white or near-white text with a dark outline or a semi-transparent background pill. Raw white text over a bright scene disappears exactly when your hook lands.
- Length: one or two lines, one thought per caption. Three-line captions force viewers to choose between reading and watching.
- Line breaks at phrase boundaries: break where you'd pause when speaking. Mid-phrase breaks make even accurate captions feel wrong.
- Consistency: pick one style and keep it across every video. Caption style is part of brand recognition in a vertical feed — viewers identify creators by it before they register the face or the voice.
Five common subtitle mistakes
- Publishing the raw auto-transcript. The errors cluster exactly where attention does: names and hooks.
- Captions over platform UI. Perfect subtitles that TikTok's buttons cover were still wasted work.
- Transcribing filler. Cut the "um", "you know", stutters — captions should read cleaner than the audio sounds.
- Tiny "cinematic" text. It looks elegant in the editor and invisible on a bus.
- Burning in before saving the SRT. Keep the editable file; the pixels are forever.
Soft subtitles vs burned-in: which export to choose
| Soft subtitles (SRT/VTT file) Burned-in (hardcoded) | ||
| Viewer can toggle | Yes | No |
| Survives re-uploads and downloads | No — file can get separated | Yes — it's pixels |
| Multiple languages per video | Yes | One per export |
| Styling control | Player-dependent | Total |
| Indexable by platforms | Yes | Only via platform's own transcription |
The practical rule most creators land on:
- YouTube (long-form): upload the SRT as a caption track. It's indexable, viewers can toggle it, and you can add more languages later without re-rendering.
- TikTok, Reels, Shorts: burn the subtitles in with a bold, high-contrast style. Vertical feeds move fast, native caption rendering varies, and styled text doubles as a design element.
- Doing both? Burn in for the vertical cut, keep the SRT with the horizontal master.
FAQ
Are auto-generated subtitles accurate enough to publish? On clear speech, yes — after the four-step check above. The raw output is usually 90-something percent there; the check exists for the handful of names, numbers and timing slips that make captions look careless. On messy audio, expect more fixing or fall back to manual.
Should I use subtitles even if my video has clear voiceover? Yes. Sound-off viewing, accessibility, and comprehension for non-native speakers all argue for it, and there's no real downside besides the minutes it takes.
How do I stop TikTok's buttons covering my captions? Keep text in the central safe band — away from the right-edge button column and the bottom description area. If you position captions in the lower third for aesthetic reasons, raise them; the four-step check includes exactly this pass.
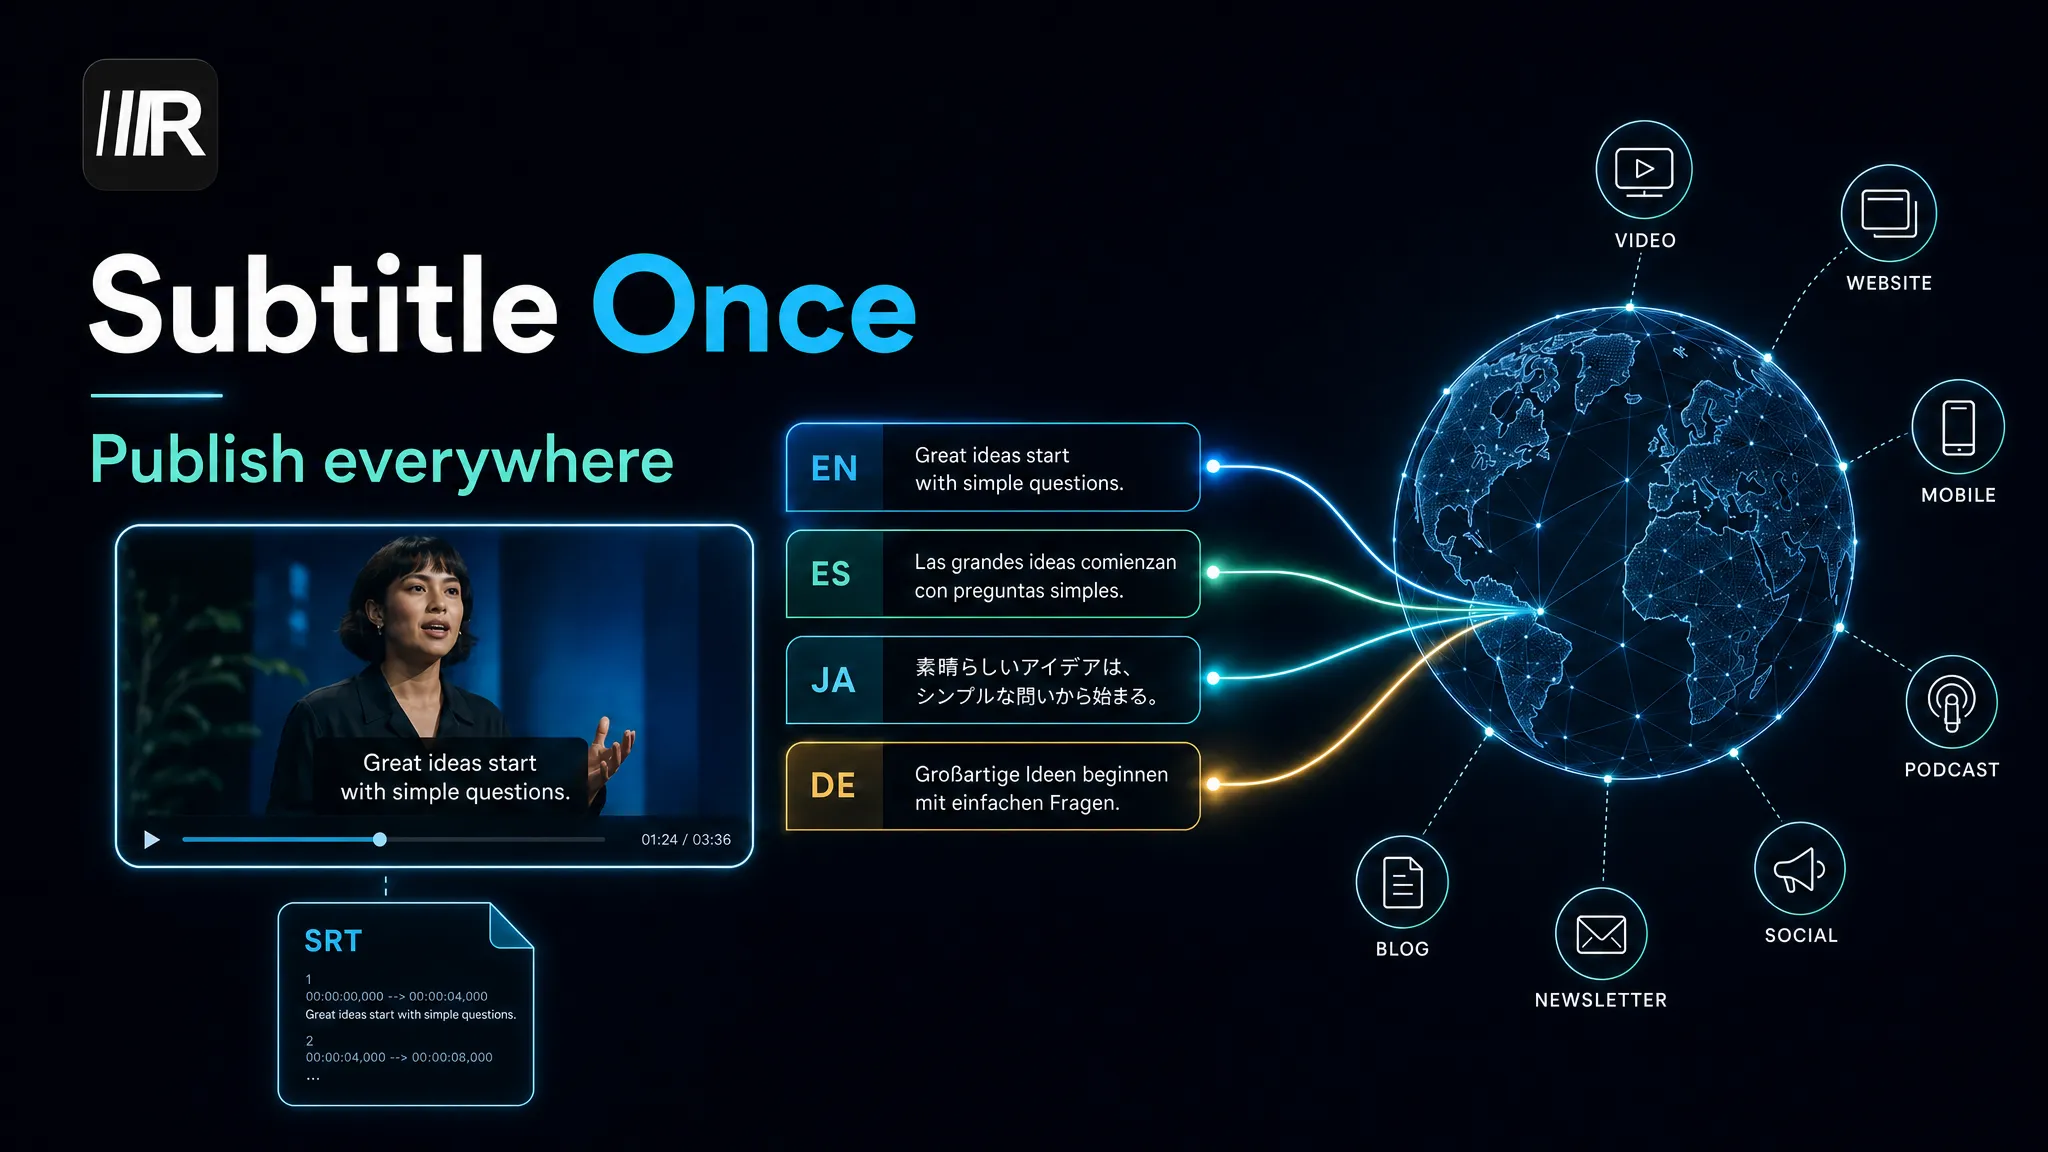
Can I translate my subtitles into other languages? Yes — and this is the strongest argument for keeping an SRT master file. Once the source-language subtitles are proofed, translating that file is fast, and every correction you made carries over into every language. We're publishing a full multilingual-subtitles workflow guide soon.
Want the fast version of everything above? Create a free account, upload one video, and you'll have proofed, styled subtitles on it in the time it took to read this guide. For the bigger picture of what AI can take off your editing plate, see our overview of AI video editing.