How to Remove Echo from a Video Recording
Learn how to remove echo from video dialogue, tell echo from reverb and room tone, apply cautious cleanup, and improve future recordings.
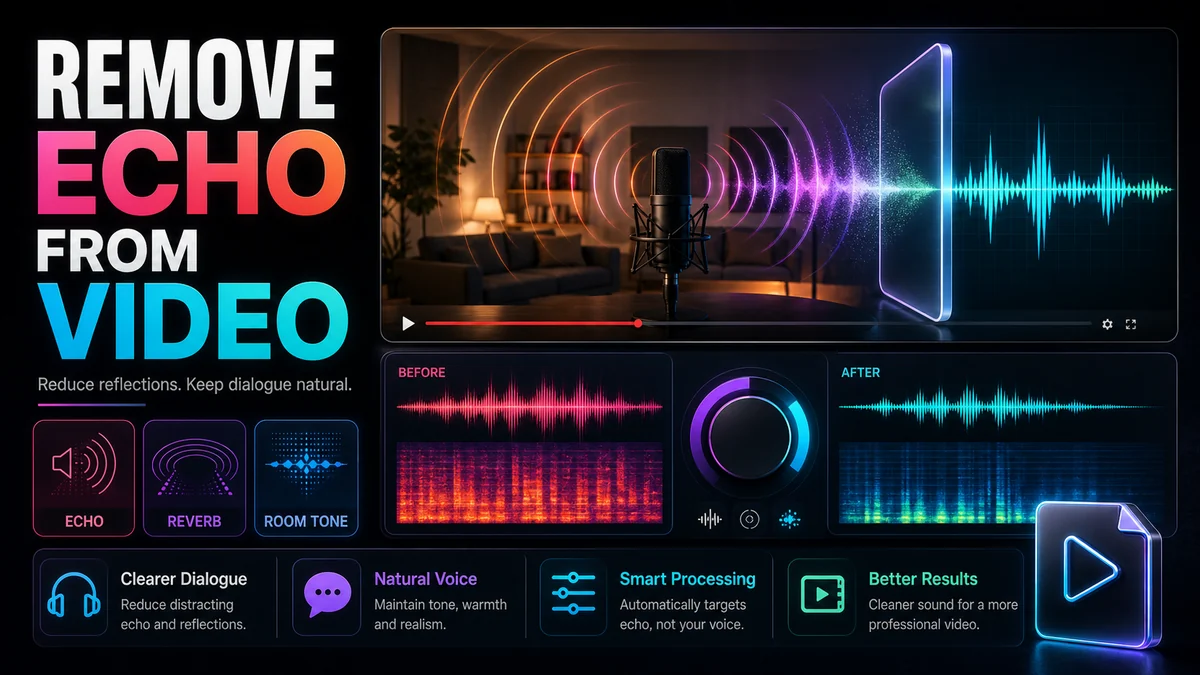
To remove echo from video, first determine whether the recording contains distinct repeats, blended room reverberation, or ordinary room tone. Reduce the problem in a short test section, compare it with the original at matched loudness, and stop before the voice becomes thin or metallic. De-reverberation can make dialogue drier and clearer, but it cannot fully reconstruct close-miked speech from a distant, heavily reflective recording.
Key Takeaways
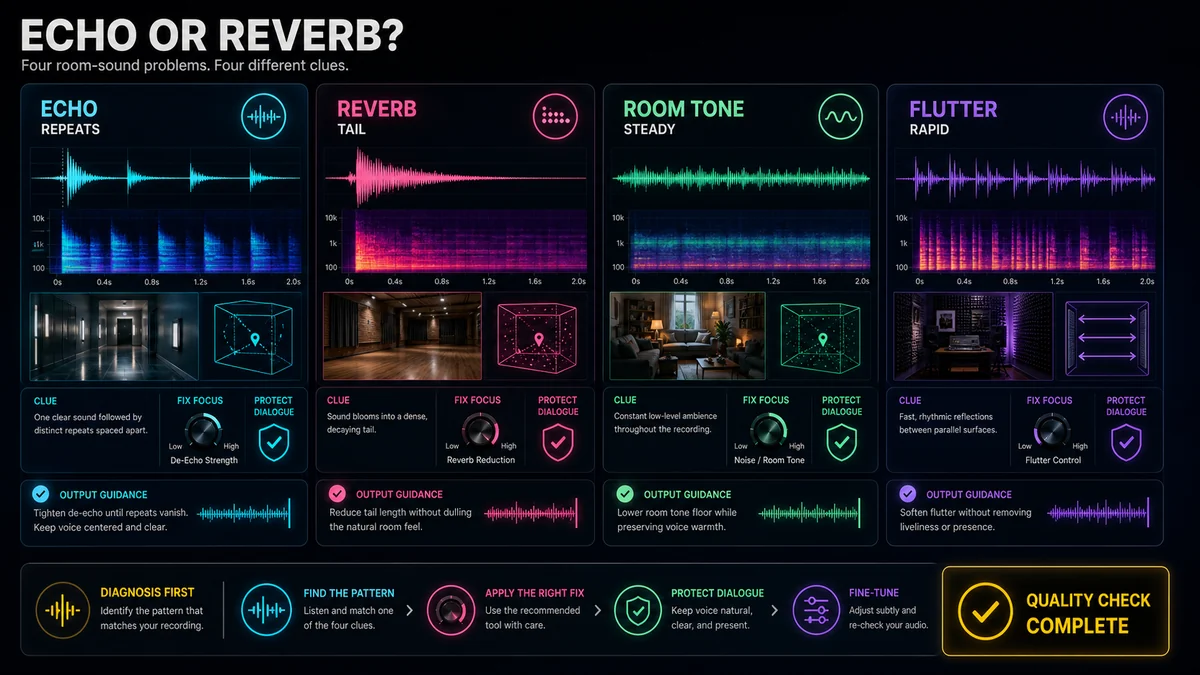
- Echo is a recognizable repeat; reverb is a dense blend of reflections; room tone is the steady ambient sound of the location.
- Most “echoey” interviews, courses, and phone recordings primarily contain room reverberation rather than a single repeat.
- Use adjustable de-reverb or dialogue cleanup conservatively and review every speaker and room change.
- General noise reduction handles steady hiss, hum, or rumble; it is not automatically the right tool for acoustic reflections.
- Better microphone distance and room treatment preserve more voice detail than post-production repair.
Echo, Reverb, and Room Tone Are Different Problems
People often use “echo” for any distant or boxy recording. The repair improves when the diagnosis is more precise.
| SoundWhat it resemblesCommon causeEditing approach | |||
| Echo | One or more identifiable repeats | A strong delayed reflection | Target the repeated tail or use de-reverb cautiously |
| Reverb | A dense wash that extends each word | Many reflections blending with direct sound | Use adjustable de-reverberation and compare naturalness |
| Room tone | Steady ambient bed between words | Ventilation, distant traffic, location ambience | Preserve for continuity or reduce as steady noise if distracting |
| Slap or flutter echo | Short rhythmic repeats | Parallel hard surfaces | Local de-reverb may help; prevention is important |
| Delay added in editing | Regular designed repetition | An intentional effect | Remove or change the effect in the original project when available |
Adobe’s official Premiere documentation defines reverb as sound waves reflecting from surfaces and blending with the original sound. Audacity’s Echo documentation describes echo as repeated audio with a fixed delay. Those definitions explain why a single generic “noise remover” may not solve both.
Step-by-Step Echo and Reverb Cleanup
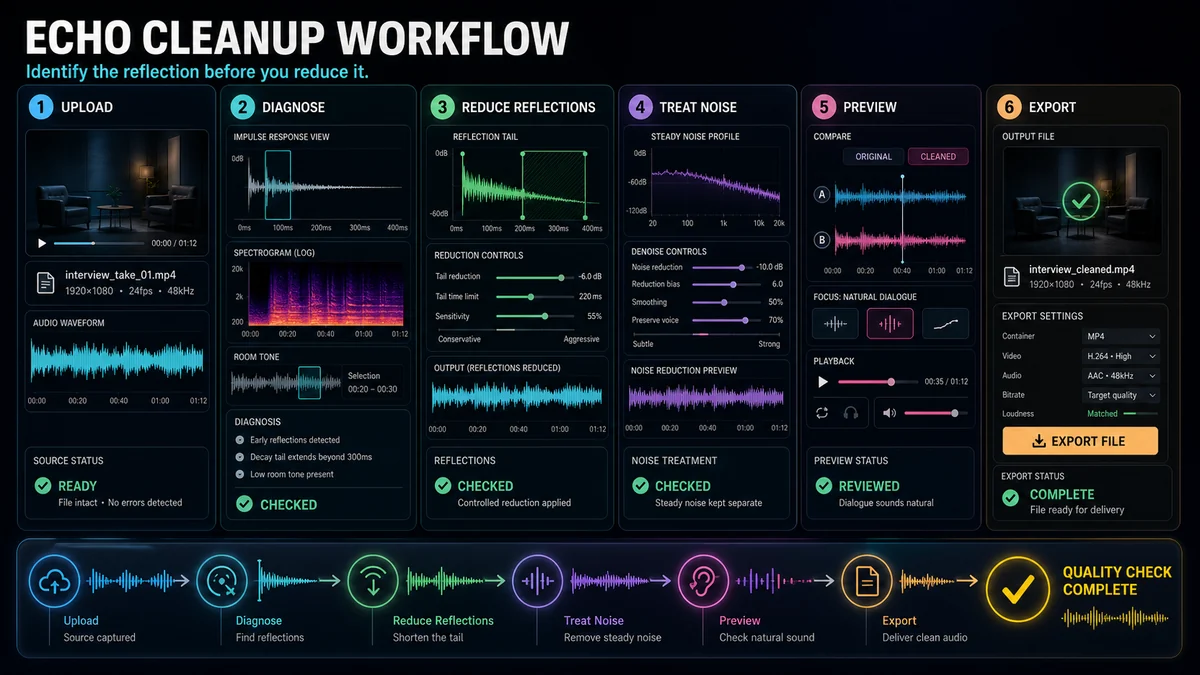
1. Preserve the source and listen in context
Keep the original video, then duplicate the audio or create a new project version. Listen through headphones and ordinary speakers. Mark changes in room, camera angle, microphone distance, speaker, and background activity.
A setting that works for a close speaker in a furnished office can overprocess a distant speaker in a tiled room. Treat major acoustic changes as separate sections.
2. Find a representative sentence
Choose a phrase containing plosives, sibilants, a sustained vowel, and a short pause. The pause reveals the reflection tail; the consonants reveal whether processing is blurring speech.
Avoid choosing only the cleanest line. Also test the worst usable line so you understand the practical limit before processing the full recording.
3. Separate dialogue when the mix is complex
If music and effects are present, use Recapo’s Audio Separator to create a dialogue stem before acoustic cleanup. This can prevent de-reverb or denoising from altering the score and sound effects.
Separation itself can leave residue, especially because room reflections are attached to the voice across time. Compare the dialogue stem with the original mix before deciding on the processing order.
4. Apply a modest de-reverb pass
Use a tool with an adjustable reverb-reduction control when the dominant issue is room reflection. Adobe documents its DeReverb effect as estimating the reverberation profile and adjusting the amount of processing. Begin gently, preview, and increase only while intelligibility improves.
Listen for warning signs:
- the voice loses body;
- consonants become splashy or phasey;
- breaths pump in and out;
- word endings disappear;
- the room tail changes unnaturally between sentences;
- different speakers no longer sound like they share a space.
If these appear, reduce the amount or process only the most affected regions.
5. Treat steady noise separately
An echoey recording may also contain air conditioning, hum, or hiss. These are separate layers. Use Recapo’s Audio Noise Reduction for a roughly steady background texture, but do not assume stronger denoising equals stronger de-reverberation.
Order matters. De-reverb can expose the noise floor; denoising can change the reflection profile. Test a short section both ways:
- modest de-reverb, then modest denoise;
- modest denoise, then modest de-reverb.
Choose the version with clearer speech and fewer artifacts. Avoid stacking aggressive passes.
6. Restore continuity
After cleanup, pauses can become unnaturally silent or switch abruptly between room sounds. Use controlled room tone from the same authorized recording to bridge edits. Add short crossfades at boundaries and keep ambience consistent beneath adjacent lines.
Room tone is not always a defect. A small, stable amount can make dialogue sound grounded and prevent edits from calling attention to themselves.
7. Match loudness before judging
Processed audio may become quieter. Adobe’s official guidance notes that removing noise or reverb can reduce clip level. Match playback loudness before comparing; listeners often prefer the louder version even when it is less clear.
Increase output gain only after cleanup, and watch for clipped peaks. Do not use loudness as a substitute for intelligibility.
8. Review and export
Listen to the full video, not only the test sentence. Check every acoustic change and every transition between repaired regions. Reopen the exported file, confirm sync, and compare on a second playback system before replacing the original in the project.
Workflows for Common Recording Types
Interview in a reflective room
Prioritize intelligibility and natural voice tone. Process each microphone separately when isolated tracks exist. If only the camera mix remains, use modest de-reverb, preserve room tone between answers, and avoid making the guest sound unnaturally close while the image shows a wide shot.
Online course or screen recording
Consistency across lessons matters. Create a restrained cleanup approach from a representative lesson, then verify it against recordings from different days or rooms. Do not copy settings automatically if the microphone position changed.
Phone video in a kitchen, hall, or bathroom
The phone may be far from the speaker while hard surfaces create strong reflections. De-reverb may improve clarity, but distant direct sound limits what can be recovered. Captions or a replacement voiceover can be more honest than extreme processing.
Multi-speaker panel
One setting may not suit every seat and microphone distance. Split the timeline by speaker or acoustic condition, then process in groups. Check that the final mix still sounds like one shared space.
Echo Removal Quality Checklist
- Echo, reverb, and room tone were diagnosed separately.
- The original recording is preserved.
- More than one section and speaker were tested.
- Cleanup improves intelligibility at matched loudness.
- Consonants, breaths, and word endings remain natural.
- Pauses retain believable ambience.
- Processed and unprocessed regions transition smoothly.
- Music and effects were not unintentionally damaged.
- The exported video remains synchronized.
What Cleanup Cannot Recover
Post-production has a ceiling. If the direct voice is quiet and reflections dominate, the recording may not contain enough distinct information for a clean, close result. If two people talk over each other in a reverberant room, de-reverb cannot reliably separate their words. If the microphone clipped, acoustic cleanup cannot recreate the flattened peaks.
Use the least compromised solution available:
- an alternate microphone or camera track;
- a different take;
- a short voiceover pickup;
- captions for an otherwise usable passage;
- a cutaway that supports a re-recorded line;
- a full re-record for mission-critical dialogue.
Prevent Echo in Future Video Recordings
- Move the microphone closer to the speaker.
- Use a directional microphone appropriately when the setup allows it.
- Move away from bare parallel walls and corners.
- Add soft materials such as curtains, rugs, furniture, or purpose-built acoustic treatment.
- Turn off avoidable fans and appliances during the take.
- Record a short test and listen through headphones.
- Capture room tone for editing continuity.
- Record isolated microphones instead of relying only on a distant camera microphone.
Distance is especially important. A closer microphone captures a stronger direct voice relative to room reflections. That improves the source before any algorithm has to estimate what belongs to the speaker and what belongs to the room.
Frequently Asked Questions
Can echo be completely removed from a video?
Not reliably in every recording. Mild or moderate reverberation can often be reduced, but severe reflections and distant speech may leave artifacts or remain audible.
Is echo the same as background noise?
No. Echo and reverb are reflected versions of the desired sound. Background noise is a separate unwanted source such as hiss, hum, or fan noise.
Should I use noise reduction or de-reverb first?
Test both orders on a short section. The best order depends on which problem dominates and how each process changes the other. Use modest settings and compare with the original.
Why does my voice sound metallic after echo removal?
The processing may be too aggressive or the reflections may overlap heavily with the direct voice. Reduce the amount, process fewer regions, or use an alternate take.
Can an audio separator remove room echo?
It can isolate dialogue from music and effects, but reflections attached to the voice may remain in the dialogue stem. Use separation and de-reverberation as distinct steps.
Make Dialogue Drier, Not Artificial
The goal is clear, believable speech—not a perfectly silent room. Start with a short test, separate dialogue when the mix requires it, and use cautious acoustic cleanup. Recapo’s Audio Noise Reduction can handle steady noise that accompanies an echoey recording, while dedicated de-reverb treatment addresses the reflections themselves.
References and Official Sources
- Recapo Audio Noise Reduction
- Recapo Video Audio Separator
- Adobe Premiere: Repair Dialogue
- Adobe Audition: Noise Reduction and Restoration Effects
- Audacity Manual: Echo
- Audacity Manual: Noise Reduction
Related Recapo Guides
- How to Remove Wind Noise from Video Audio
- How to Remove Background Noise From a Video
- How to Separate Dialogue, Music, and Sound Effects from a Video