
How to Turn Tutorial Videos Into YouTube Shorts
Turn tutorial videos into focused YouTube Shorts with clear steps, readable screen details, captions, vertical framing, and a practical QA workflow.
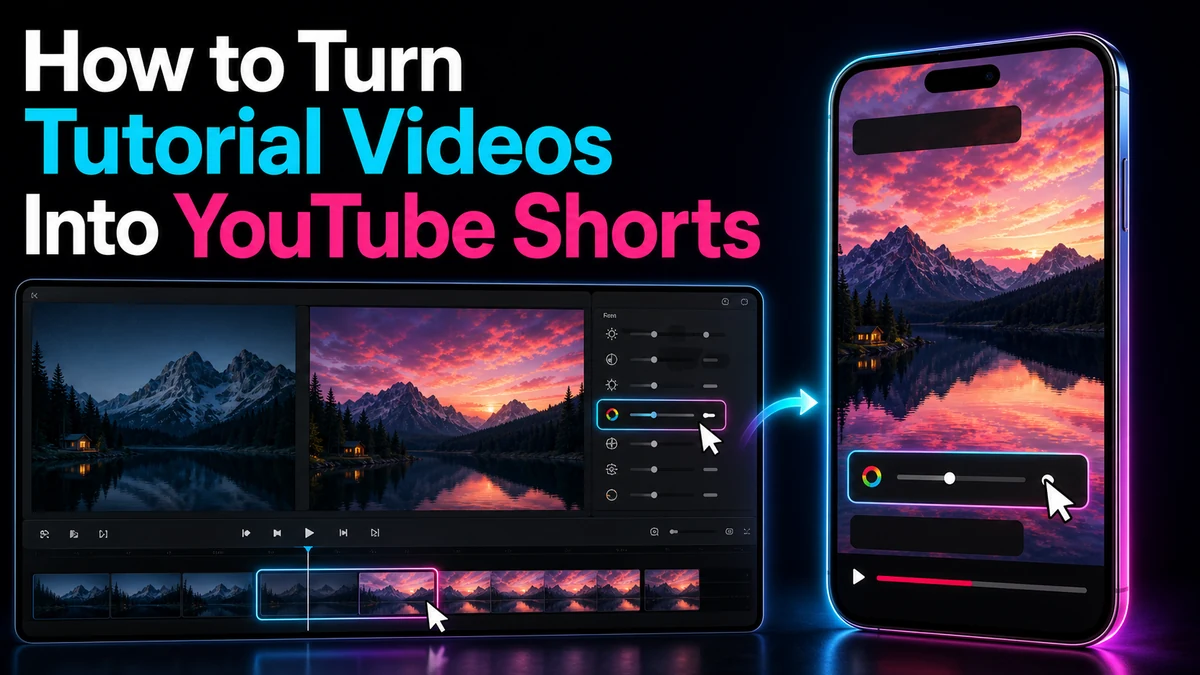
How to Turn Tutorial Videos Into YouTube Shorts
To turn tutorial video into YouTube Shorts content that still teaches something, extract one complete task rather than compressing an entire lesson. The viewer should be able to recognize the problem, follow the decisive action, and see the result without missing setup. For screen recordings, that also means reframing around the active interface, keeping the cursor visible, enlarging details intentionally, and checking every caption at phone size.
YouTube currently says square or vertical videos can qualify as Shorts when they are up to three minutes long. That is a platform limit, not an editorial target. A micro-tutorial should last only as long as its idea requires, with enough context to make the action reproducible and no unrelated steps.
Key Takeaways
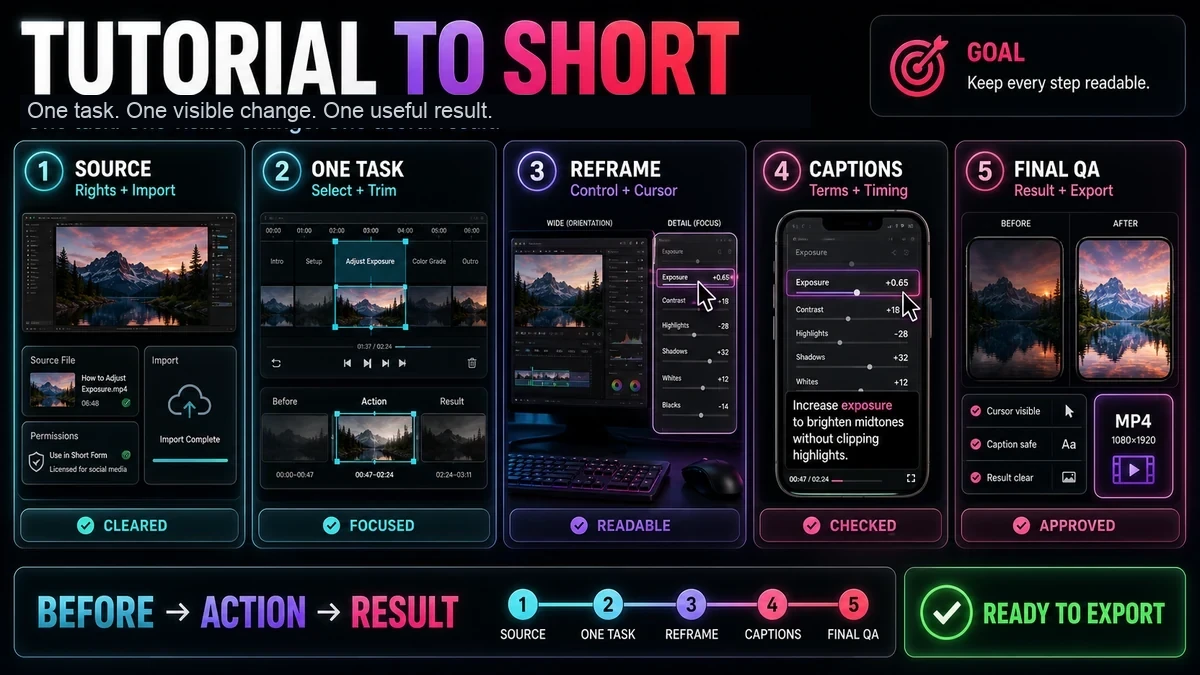
- Build each Short around one task, one visible change, and one useful result.
- Use a before-action-result sequence so viewers understand both the reason for the step and what success looks like.
- Reject clips that rely on accounts, files, settings, or earlier lessons that the Short never explains.
- Reframe screen recordings around the active control, but preserve enough surrounding interface for orientation.
- Keep the cursor, labels, captions, and final state legible on a phone; do not assume a desktop preview is sufficient.
- Treat transcript search and a first vertical crop as editing aids. A person still needs to choose the lesson, check accuracy, and approve the export.
What Makes a Tutorial Work as a Short?
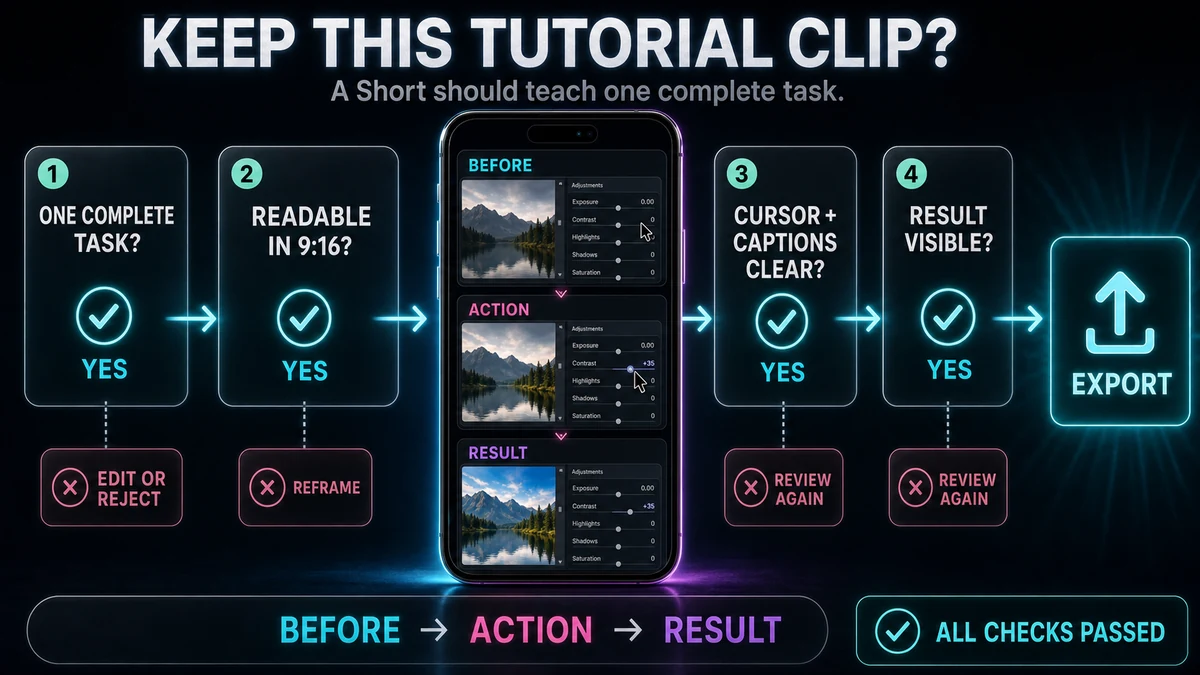
A Short needs a clean teaching boundary. The best candidate is not necessarily the most dramatic moment; it is the smallest segment that produces a meaningful, visible outcome.
Use these selection criteria before opening the vertical editor:
| Selection criterionA strong candidateA weak candidate | ||
| One-task scope | Change one setting, apply one technique, or fix one issue | “Learn the entire application” |
| Starting state | The problem is visible or can be stated in one line | The viewer needs an earlier chapter to understand the screen |
| Decisive action | One short sequence creates the change | The process jumps among several tools, accounts, or files |
| Visible result | The viewer can compare before and after | Success happens off-screen or requires later analysis |
| Interface legibility | Relevant controls can be shown clearly in 9:16 | Essential labels are spread across the full desktop |
| Context independence | Required setup is included or unnecessary | The narration says “use the settings we created earlier” |
This is why a short, self-contained fix often translates better than a condensed chapter. “Make the header remain visible while scrolling” is a teachable unit. “Build a complete reporting system” is a series.
Use a Before-Action-Result Sequence
Open on the state that needs changing, show the action in reproducible order, and hold on the result. The “before” can be one screen state plus a direct line of narration. The “result” should show the changed setting or behavior, not a generic “done” card.
Preserve Only the Setup the Viewer Needs
A clip can be accurate yet impossible to follow because a file is already open, a plugin is installed, or a selection was made off-screen. Add a compact setup shot, narrow the promise, or choose another excerpt. Never imply that an unshown prerequisite happens automatically; if it consumes most of the Short, give it a separate tutorial.
A Tutorial-to-Short Workflow
The following workflow covers rights, content selection, screen-recording reframing, captions, quality review, and export. Perform the steps in order; an early selection mistake cannot be repaired by a polished crop.
1. Check Rights Before Editing
Use footage and assets you have the right to use. Remove or mask customer data, messages, license keys, email addresses, and internal dashboards before reframing; a vertical crop may make sensitive details more prominent.
Copyright questions depend on the specific facts. YouTube notes that fair use is decided case by case and ultimately by courts, and that credit or a disclaimer does not itself create permission. Treat this paragraph as general risk guidance, not legal advice. When ownership or licensing is uncertain, get appropriate permission or professional advice before publishing.
2. Import the Rights-Cleared Source
Start with the best available original recording. Recapo’s YouTube Shorts Maker describes importing authorized local footage or a source link. Confirm that the tutorial, audio, and screen detail are intact before selecting an excerpt.
3. Select One Self-Contained Task
Search or read the transcript to locate the explanation, but verify the candidate against the video. A transcript can reveal where the instructor says “freeze the top row,” yet it cannot show whether the relevant menu, cursor, or result is visible.
Mark a selection that includes:
- the problem or intended outcome;
- every prerequisite that cannot be assumed;
- the decisive clicks, gestures, or commands;
- the visible result;
- any warning needed to prevent a predictable mistake.
Reject the candidate if it depends on an unexplained earlier configuration or if the outcome appears much later in the source.
4. Trim for Clarity, Not Just Speed
Remove greetings, navigation delays, repetition, failed takes, and unhelpful pauses. Preserve cursor travel when it provides orientation; a hard cut across a complex interface can make the action harder to reproduce. Check that audio and interface state remain continuous across every edit.
5. Reframe the Screen Recording for 9:16
Set the project to a 9:16 canvas before fine-tuning overlays. Then decide what the viewer needs to see at each moment: the entire application, one panel, a menu, the cursor, or the result.
Hold a stable crop while the action stays in one area. Cut when focus moves elsewhere, and pan only when movement helps viewers track the action. Constant motion can be disorienting.
For each reframe, check:
- Is the cursor visible before and during the click?
- Is the selected control large enough to recognize?
- Can the viewer tell where that control sits in the wider interface?
- Does the crop preserve tooltips, menus, or confirmation messages?
- Does the result remain on screen long enough to inspect?
If a narrow crop removes context, show a wider interface, cut closer for the action, then return to a wider result. In a face-and-screen layout, give the screen most of the space when precise reading matters.
6. Add and Correct Captions
Captions can cover the controls being taught. Keep groups short, move them away from the active control, and avoid the lower and right edges where Shorts interface elements may appear. Because overlays vary by device and viewing state, use a realistic phone-sized preview rather than one universal pixel rule.
Recapo’s Auto Captions tool describes language and style choices, editable synchronized captions, and timing and position review. Transcription can mishear product terms, shortcuts, filenames, and menu labels, so correct it against the recording.
7. Run Visual, Instructional, and Audio QA
Watch once with sound, once muted to test cursor movement and captions, and once without reading captions to catch rough audio edits. Pause on the smallest labels. If they are unreadable, reframe closer or split a dense sequence into two views. Confirm that zooms do not expose blurred pixels or crop out the cursor.
8. Export and Inspect the Vertical MP4
The Recapo product page describes vertical MP4 export after selection, trimming, and adjustable 9:16 reframing. Watch the exported file and check orientation, duration, caption edges, cursor visibility, sharpness, audio synchronization, and the final frame.
YouTube’s current guidance allows qualifying square or vertical Shorts up to three minutes, including desktop uploads through YouTube Studio. Keep the edit as short as the teaching goal permits rather than stretching it to the platform maximum. Also note YouTube’s current warning that a Short longer than one minute with an active Content ID claim may be blocked globally. Recheck the official rules before publication because platform requirements can change.
Illustrative Screen Tutorial: Freeze a Header Row
This is an illustrative editing example, not a real user case, campaign, product test, or performance claim. Imagine a generic spreadsheet tutorial that teaches one task: keeping the header row visible while scrolling.
Before: Open on a table where the column names are visible, scroll down until they disappear, and pause. The narration states the problem: “When the labels leave the screen, it is easy to lose track of each column.” This establishes a visible reason for the action.
Action: Return to the top, keep the cursor visible, open the relevant view menu, and choose the command that freezes one row. Because menu names differ among spreadsheet applications and versions, the narration and on-screen label should match the interface actually recorded. Start with a brief wider view so the viewer knows where the menu is, then cut to a closer crop for the selection. Avoid a sweeping animated pan across the whole toolbar.
Result: Scroll down again and hold on the table with the header still visible. A short caption can reinforce the result: “Header stays in view.” The evidence is the changed screen behavior, not a decorative completion graphic.
This source segment would fail as a Short if it begins after the menu is already open, hides the cursor, uses a crop too tight to identify the application area, or omits the final scroll test. It would also fail if the freeze command depends on a row selection made before the excerpt. In that case, include the selection or choose a different starting point.
Tutorial-Specific Failure Modes
- The crop follows the speaker, not the lesson. Prioritize the active control during precise actions; show the instructor when their face adds information.
- Every click gets a new zoom. Group nearby actions in one stable composition and reframe only when attention moves.
- The cursor disappears at the edge. Review its complete path and reposition the crop before the pointer reaches a side panel.
- Captions cover the interface. Shorten, move, or retime them instead of shrinking both captions and controls into illegibility.
- The result is asserted, not shown. Hold on the changed state and, when useful, repeat the behavior that failed in the opening.
- The promise exceeds the clip. Title one demonstrated setting as one setting, not a complete mastery guide.
Final Checklist and Limitations
- Every visual, audio, font, music, and source element is cleared for the intended use.
- Private data, credentials, notifications, and customer information are removed or masked.
- The Short teaches one task with a visible before, action, and result.
- Required setup appears in the clip or is not needed.
- The cursor path and active interface control stay inside the 9:16 frame.
- Zoom and pan choices improve orientation rather than creating motion for its own sake.
- Interface labels remain readable at phone size.
- Captions match the audio, use correct technical terms, and avoid important controls.
- Cuts preserve logical interface state and continuous audio.
- The result is shown long enough to verify.
- The exported file is square or vertical and within YouTube’s current Shorts duration rules.
- Any music or claimed material has been checked against YouTube’s current guidance.
Some tutorials will not survive a vertical conversion. A wide code comparison, multi-window data workflow, or precise design canvas may become unreadable when cropped. In those cases, record a dedicated vertical version, redesign the lesson as several Shorts, or keep the material in a long-form format. The goal is not to force every source into 9:16; it is to preserve the instruction.
Use Recapo as an Editing Starting Point
Recapo’s YouTube Shorts Maker can support the mechanical part of this process: import authorized footage or a source link, locate a section through the transcript, trim it, adjust a 9:16 reframe, and export a vertical MP4. It does not remove the need to judge whether the task is self-contained, whether a cursor or control is visible, or whether the lesson remains accurate after trimming.
Use the tool to build a first vertical cut, then apply the tutorial-specific QA checklist above. If the source itself needs a better screen recording or missing setup, fix the source rather than expecting reframing to invent information that was never captured.
Frequently Asked Questions
How long can a tutorial YouTube Short be?
Under YouTube’s current rules, a qualifying square or vertical Short can be up to three minutes. Use only the time needed for setup, action, and result.
Should I show my face and the screen at the same time?
Only when both add information. Give the screen more space when viewers must read a menu or follow a cursor.
How do I keep a cursor visible in a vertical crop?
Review the pointer’s path and position the crop before it reaches the next action. Use stable crops and cut when focus moves to another interface area.
Can captions replace showing the missing steps?
No. Add a setup shot, narrow the promise, or choose another segment when the task depends on unrecorded work.
Can Recapo choose the correct tutorial segment automatically?
The product page supports locating sections through a transcript. You must still confirm the setup, visible action, correct screen state, and final result.
Can I upload a Short from a computer?
Yes. YouTube describes uploading square or vertical Shorts of up to three minutes through YouTube Studio on desktop. Recheck its Help pages before uploading.
References and Official Sources
- Recapo YouTube Shorts Maker
- YouTube Help: Understand three-minute YouTube Shorts
- YouTube Help: Upload YouTube Shorts from a computer
- YouTube Help: Get started creating YouTube Shorts
- YouTube Help: Fair use on YouTube
Related Recapo Guides
- How to Make YouTube Shorts from Horizontal Video
- YouTube Shorts Safe Zone Guide
- How to Add Auto Captions to YouTube Shorts
- How to Make YouTube Shorts on Desktop