
How to Make YouTube Shorts From a Product Demo
Turn a product demo into a clear YouTube Short with problem–feature–result structure, legible UI, visible proof, and an honest next step for viewers.
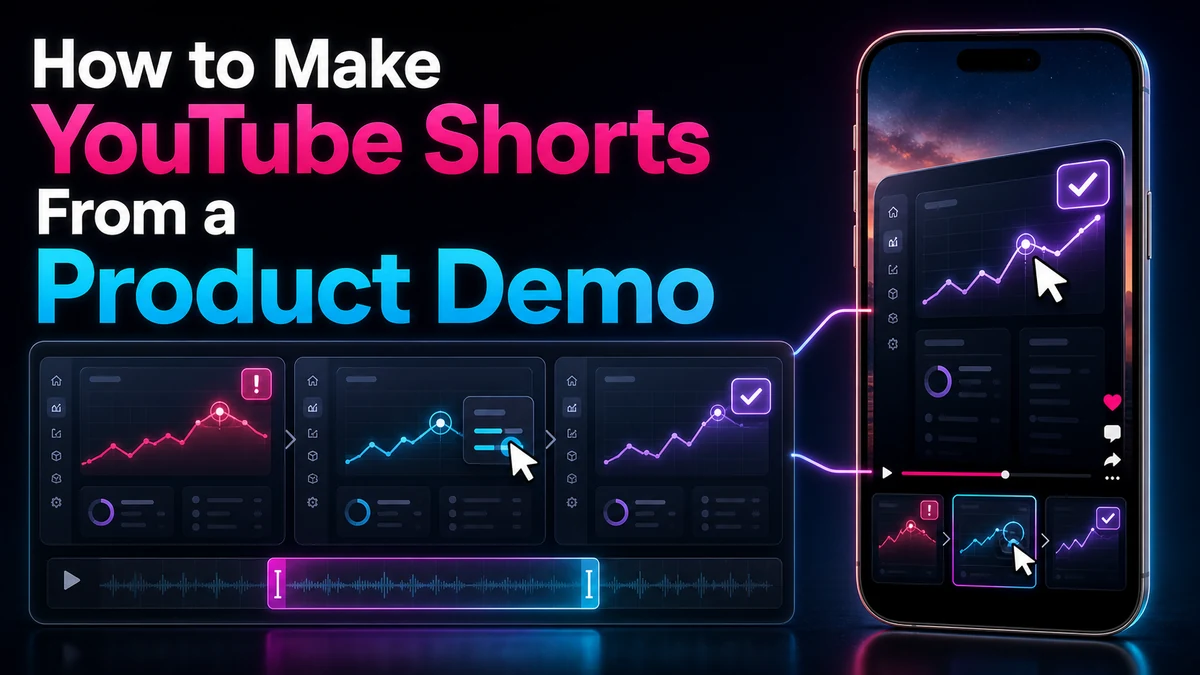
How to Make YouTube Shorts From a Product Demo
Effective product demo YouTube Shorts do not squeeze an entire sales presentation into a vertical frame. They isolate one recognizable problem, show the feature action that addresses it, and preserve a visible result the viewer can judge. The edit should make the demonstration easier to understand without turning an interface tour into an unverifiable promise.
YouTube currently allows qualifying square or vertical Shorts up to three minutes. That is a platform limit, not an editorial target. Choose the shortest length that makes the problem, action, and result clear.
Key Takeaways
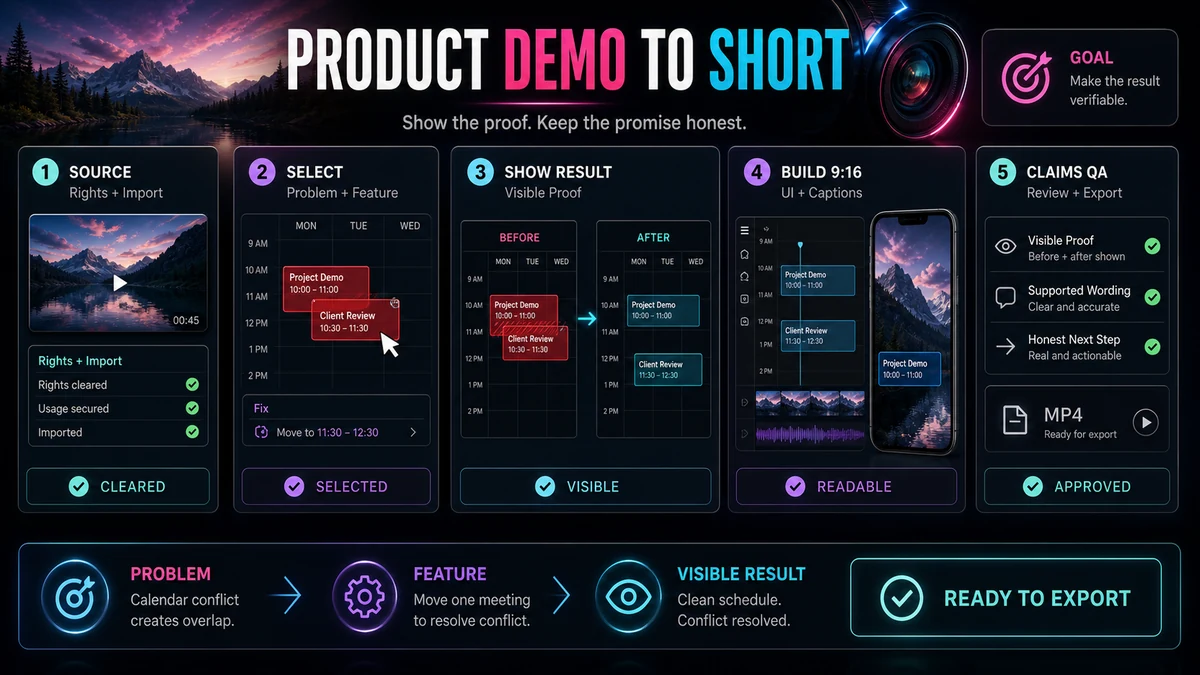
- Build the Short around one problem, one feature action, and one visible result.
- Select source footage only when the proof remains understandable after trimming.
- Distinguish a demonstration from an advertisement: show what happens instead of relying on broad claims.
- Reframe each shot so the relevant control, cursor action, and result remain legible in 9:16.
- Review captions, crop changes, claim language, audio continuity, and the exported file before upload.
- End with an honest next step that matches what the viewer actually saw.
A Product Demo Short Needs Evidence, Not a Feature List
A conventional product demo may include introductions, several use cases, configuration details, customer context, and a closing pitch. A Short has less room, but the answer is not simply to speak faster. It is to narrow the promise.
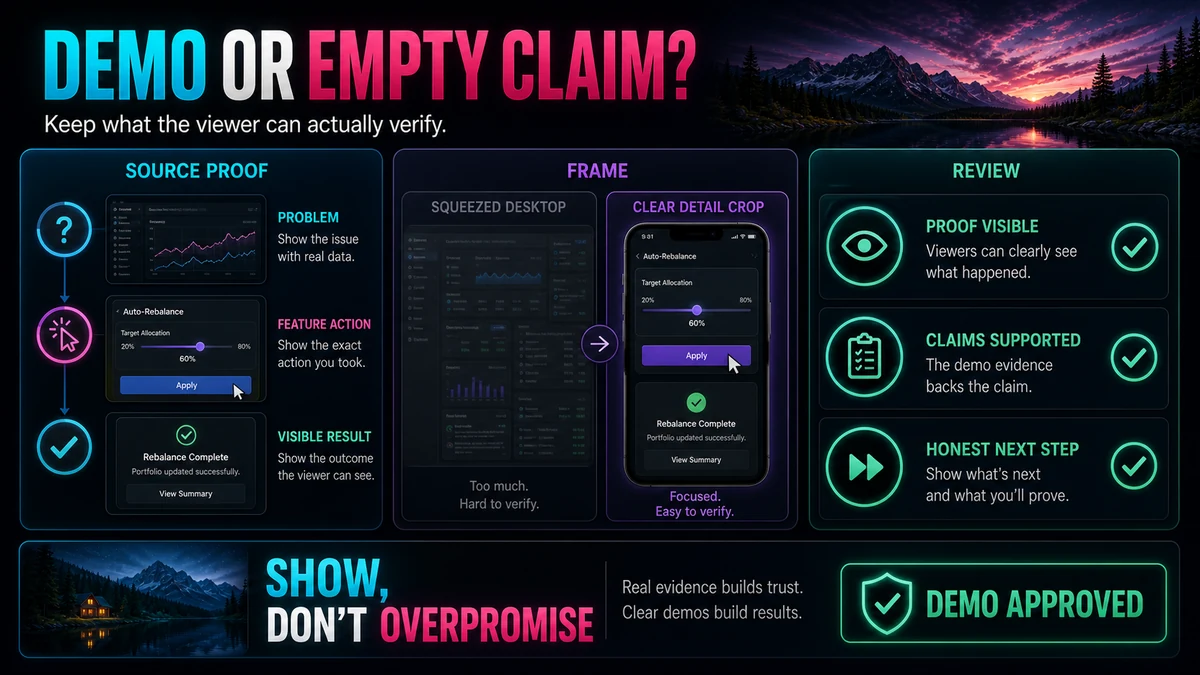
Use this three-part structure:
- Problem: Show or state a specific obstacle the viewer recognizes.
- Feature: Demonstrate the action that changes the situation.
- Visible result: Hold long enough for the viewer to see what changed.
For software, the proof might be a status changing, a field being populated, an error being resolved, or an output appearing. For a physical product, it might be a part fitting into place or the device completing a clearly shown task. The result should exist in the source footage; editing should reveal it, not manufacture it.
Avoid replacing proof with phrases such as “game-changing,” “guaranteed,” or “the fastest.” Those are promotional claims, not demonstrations. If a comparative or performance claim is important, it needs appropriate evidence and review outside the edit itself. When that support is unavailable, describe the observable action plainly.
Demonstration Versus Advertisement
A product demo explains how something works in a defined situation; an advertisement may focus on positioning or desire. Ask what the viewer can verify from the clip. “Select the date and the conflict warning clears” points to visible events. “Never miss a deadline again” predicts an outcome the interface cannot prove.
This difference also shapes the ending. “Try this workflow with your own schedule” follows the demonstration. A feature should not be presented as a guarantee of a broader business result.
Select a Scene That Can Survive the Short Edit
Screen the source for a self-contained sequence whose setup, action, and proof remain intact when removed from the longer demo.
Use these selection criteria:
| CriterionStrong candidateWarning sign | ||
| Problem clarity | The obstacle is visible or can be stated in one line | The viewer needs several minutes of earlier context |
| Feature action | One action or short sequence drives the change | Several unrelated settings must be explained |
| Visible proof | The outcome appears clearly in the recorded source | The narration claims success while the screen stays unchanged |
| Vertical legibility | The relevant interface area can fill a 9:16 frame | Essential controls sit at opposite edges of a wide desktop |
| Clean boundaries | The scene has a natural entry and stopping point | It begins with “as mentioned earlier” or ends before the result |
| Claim discipline | The words describe what the footage supports | The script depends on an unverified performance claim |
Typical failures include delayed proof, evidence hidden by a tooltip, essential states split across windows, or a reaction shot replacing the product when the result appears. Choose a stronger segment, preserve more context, or make a new rights-cleared recording; do not invent a result card or fake state.
Workflow: Turn the Demo Into a Vertical Short
The following workflow keeps rights, story, framing, and claim review in the same editing process.
1. Confirm Rights Before Editing
Use footage, music, logos, screenshots, and customer data you have permission to use. Remove personal information, private workspaces, account identifiers, and confidential records before import. Review any necessary third-party brand appearance for accuracy and permission.
Attribution or a disclaimer does not automatically create permission. Fair use is fact-specific and ultimately decided by courts, and platform systems may still identify protected material. This is general risk guidance, not legal advice. When rights are uncertain, replace the asset or get qualified advice before publishing.
2. Import the Rights-Cleared Source
Start with the highest-quality available master. Repeated compression can make interface labels and cursor movement difficult to read after cropping. Keep a clean narration track when possible.
Recapo’s YouTube Shorts Maker supports importing local footage or a source link you have the right to use. Import does not settle rights questions; that check still belongs to the creator.
3. Select the Problem–Feature–Visible-Result Sequence
Use the transcript and timeline to locate the shortest complete sequence. Mark where the problem becomes understandable, the feature action, and the first verifiable result. Remove references to omitted context or include enough setup for the original sentence to make sense.
When several features appear in one passage, choose the one with the clearest proof. A Short titled around one feature should not drift into three more controls simply because they occur nearby in the source.
4. Trim Without Removing the Proof
Cut greetings, navigation delays, repetition, and empty loading time, but preserve the state before the action, what the presenter did, and what changed.
Do not jump from the initial state directly to a polished output. Keep the decisive click, drag, selection, or command, then hold the result long enough to read at phone size.
5. Reframe the Demo for 9:16
Set the vertical canvas before fine caption work. A desktop recording rarely remains legible when the entire width is squeezed into a phone-shaped frame. Crop toward the active region, then change the framing when the visual priority changes.
Show the relevant error or unfinished state, keep the cursor and target control together during the action, then settle on the changed result. If the before and after areas are far apart, cut between stable crops instead of panning rapidly.
Do not zoom so aggressively that text becomes soft or neighboring labels lose meaning. When two interface regions must be compared, a stacked layout or brief full-screen cutaway may be clearer than shrinking the whole desktop. Review the YouTube Shorts Safe Zone Guide when positioning essential UI, captions, and calls to action near likely interface overlays.
6. Add Captions That Support the Screen
Captions are useful when viewers watch without sound, but they compete with the interface for space. Use short groups, strong contrast, and consistent placement away from the control being demonstrated. Do not cover the visible result with a word-for-word subtitle block.
Edit product names, technical terms, and punctuation manually. Transcript-based captions can provide a starting point, but they still need timing and accuracy review. Recapo’s Auto Captions page describes language and style choices, editable synchronized captions, timing and position review, and captioned-video output. The related guide explains a fuller auto-caption workflow for YouTube Shorts.
7. Run Editorial and Visual QA
Watch once for story, once for screen detail, and once for claims. Confirm that a new viewer can identify the problem and result; inspect the cursor, interface text, captions, crops, and private information; then compare every statement with what the footage demonstrates.
Listen without watching to catch abrupt narration edits or background-noise changes. Then watch without sound to confirm that the visuals still communicate cause and effect.
8. Export and Inspect the Final File
Export a vertical MP4 and review that file, not only the editor preview. Check the opening, text sharpness, caption sync, and whether the result survives compression. Recapo’s public page describes vertical MP4 export, not automatic publishing; upload and platform review remain separate steps.
YouTube’s current rules allow qualifying square or vertical Shorts up to three minutes. For standard channels, YouTube says this classification applies to qualifying uploads made on or after October 15, 2024. A Short longer than one minute with an active Content ID claim may be blocked globally, so check rights and current platform guidance before upload. Whatever duration is allowed, keep the editorial length appropriate to the demonstrated idea.
Illustrative Example: A Scheduling Software Demo
The following scenario is illustrative, not a reported customer case, product test, or performance claim.
Imagine a scheduling-software demo covering setup, preferences, several views, and conflict resolution. The Short isolates the conflict-resolution sequence.
- Problem: Two appointments visibly overlap, and the interface shows a conflict warning.
- Feature: The presenter drags one appointment to an open time slot.
- Visible result: The appointment settles into the new slot and the conflict warning clears.
The edit opens on the overlap, captioned “Two bookings, one time slot.” The crop shows both appointments and the warning. During the drag, it keeps the cursor, card, and destination visible, then holds steadily on the cleared warning.
An honest closing line could be, “Try the rescheduling workflow with a test calendar.” A claim such as “This eliminates every scheduling error” would not be supported by the scene. The clip demonstrates one interface behavior; it does not prove a universal outcome.
If the warning and destination cannot both remain readable, cut from a close view of the conflict to a close view of the open slot. The cursor action and interface response preserve the causal link.
Product-Demo Review Checklist
- The source footage and included assets are cleared for use.
- Private data, account details, and confidential screens are removed.
- The Short covers one specific problem and one relevant feature.
- The feature action is visible rather than described off-screen.
- The result appears in the original source and remains on screen long enough to inspect.
- Spoken, captioned, and graphic claims match the visible evidence.
- The active control, cursor, and result are legible in the 9:16 frame.
- Crop changes follow the task instead of drifting continuously.
- Captions are accurate, readable, synchronized, and clear of important UI.
- Audio cuts sound natural and do not alter the meaning of the demonstration.
- The ending offers a truthful next step without promising an outcome.
- The exported file has been reviewed from beginning to end on a phone-sized display.
- The file meets current YouTube Shorts format and duration rules.
Limitations to Keep in View
Complex onboarding, multi-user workflows, security settings, and integrations may require context a compact edit cannot preserve. Dense dashboards or code can also become unreadable vertically. Demonstrate one bounded action and direct interested viewers to a full tutorial.
Transcript search can speed up locating a passage, but it cannot decide whether the footage visibly proves the claim. Automated captions can mishear product names. A first-pass crop can follow the speaker while missing the interface. Human review remains necessary for editorial meaning, rights, privacy, accuracy, and framing.
A Practical Recapo Starting Point
If you already have rights-cleared demo footage, open the Recapo YouTube Shorts Maker to import it, locate the relevant passage through the transcript, trim the sequence, adjust the 9:16 framing, and export a vertical MP4. Treat the result as an editable production step, then run the claim, crop, caption, and export checks in this guide before uploading.
The tool can make the mechanical workflow more direct, but it cannot guarantee that a selected moment is your best one, verify every product claim, clear third-party rights, or promise growth. Those decisions remain with the creator and reviewer.
Frequently Asked Questions
How long should a product demo YouTube Short be?
Long enough to establish the problem, show the feature action, and hold on the result—without unrelated setup. YouTube currently allows qualifying square or vertical Shorts up to three minutes, but a simple demonstration may be more effective at a shorter editorial length. Fit the duration to the idea.
Should the Short show the presenter or only the product?
Show whichever view carries the evidence. A presenter can establish context, but the product should be visible when the feature acts and the result appears. A brief face shot, picture-in-picture layout, or clean cut can preserve personality without hiding the proof.
Can I use claims from the original sales demo?
Only after checking that they remain accurate, appropriately supported, and suitable for the new context. Trimming can remove qualifications that made a statement accurate in the longer video. If the Short cannot preserve that context, narrow the wording to what viewers can observe.
How do I make small software controls readable in 9:16?
Crop to the active interface region, shorten captions, and cut between stable views when the task moves across the screen. Do not shrink an entire desktop recording until labels become illegible, and do not zoom beyond the useful quality of the source.
Can Recapo publish the finished Short automatically?
The verified Recapo product page supports import, transcript-based locating, trimming, adjustable 9:16 reframing, and vertical MP4 export. It does not support a claim of automatic publishing. Upload and review the exported file through your chosen platform workflow.
Is crediting the original creator enough to use demo footage or music?
Not necessarily. YouTube’s copyright guidance notes that credit or a disclaimer does not itself create permission, and fair use depends on the facts. Use rights-cleared material and seek qualified advice for a specific legal question.
References and Official Sources
- Recapo YouTube Shorts Maker
- YouTube Help: Understand three-minute YouTube Shorts
- YouTube Help: Upload YouTube Shorts from a computer
- YouTube Help: Get started creating YouTube Shorts
- YouTube Help: Fair use on YouTube
Related Recapo Guides
- How to Make YouTube Shorts From Horizontal Video
- YouTube Shorts Safe Zone Guide
- How to Add Auto Captions to YouTube Shorts
- How to Make YouTube Shorts on Desktop